## SRM-20 Mill
The SRM-20 is sometimes called a "circuit board mill", because it's most commonly used to mill copper traces for circuit boards. However, it also works great for milling soft materials like wax or wood (it can even cut aluminum if you're careful with setting). We'll prepare an STL file, then import it to the Modela CAM software SRP Player, which will convert the shape to gcode to control the machine.
### Preparing the STL
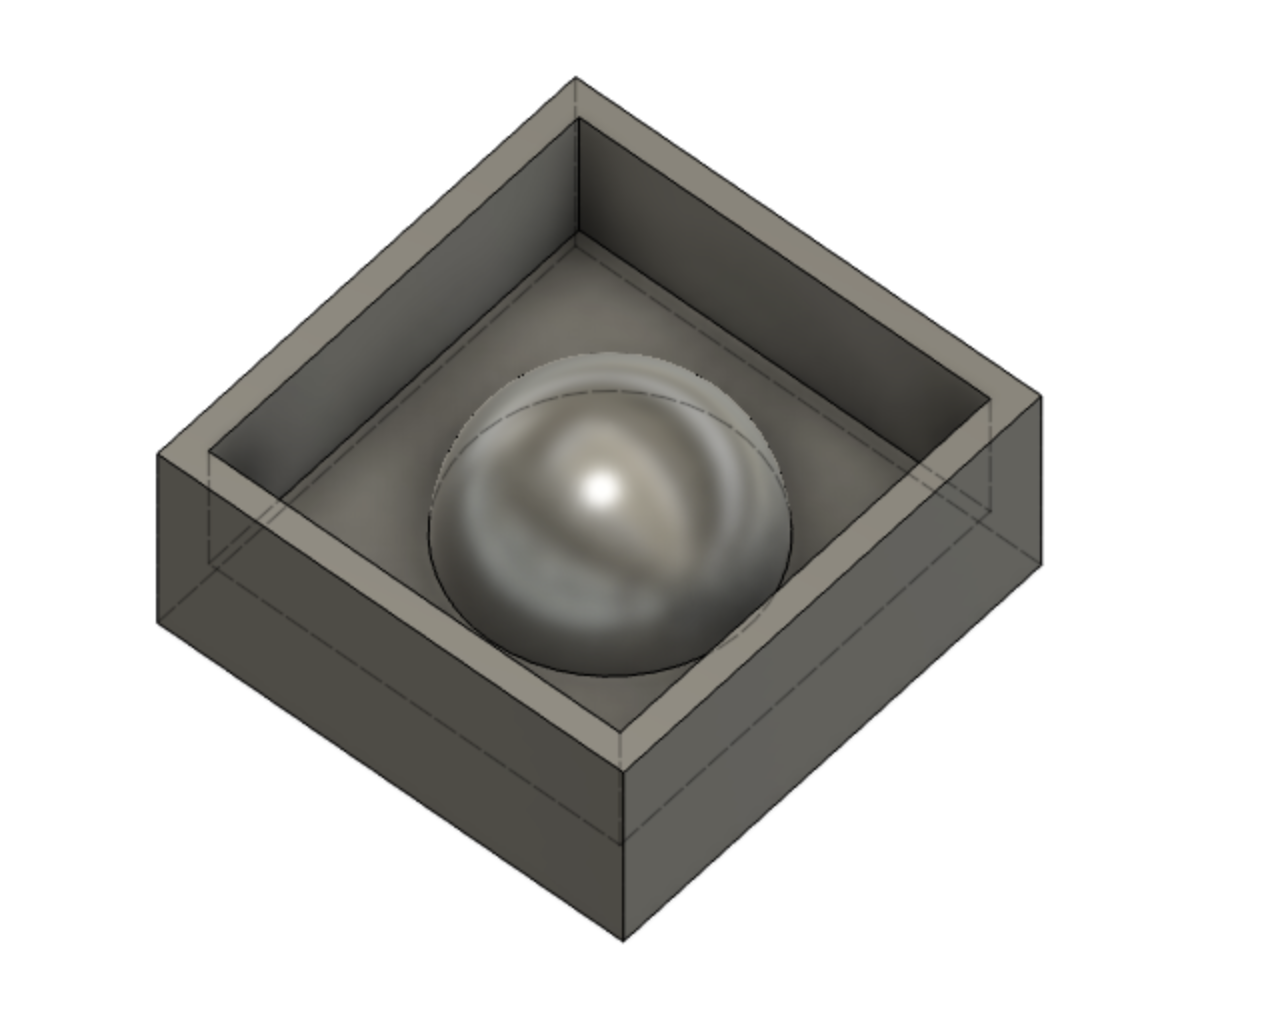
Model a single unified mesh. If it is meant to be a mold, make sure to include walls that will contain the molding material (the walls should be higher than the pattern geometry). Export as STL.
### Cutting the File
Our friends at GSD have a [nice guide](https://wiki.harvard.edu/confluence/display/fabricationlab/Preparing+the+Machine) for the SRM-20 (our process is similar but without the special z-axis sensor).
- Open VPanel to control the machine
- Set the origin to be the midpoint of the top face of the stock
- Go back to SRP Player and start the file from there
<!-- ### Start Mods
- On the Windows Desktop, double-click the shortcut "start mods"
- Navigate to [mods.cba.mit.edu](mods.cba.mit.edu)
- Right click -> Programs -> Open Server Program -> Machines -> Roland mill -> SRM-20 -> mill 3D stl
- You should see "socket opened" in the WebSocket device window. The machine should respond to the "move to origin" and "move to home" keys.
- See [video demo](http://academy.cba.mit.edu/classes/computer_machining/3D.mp4)
### Prepare Machine
- Hit "move to home" to bring spindle up.
- Clean sacrificial layer, and attach wax block using double-stick tape (not hot glue).
- Put an end mill (flat or ball end) in the collet (insert high - almost all the shaft in the collet).
- Hit "move to origin". Adjust x, y, and z to as needed. (For a 1.5" wax block try x=30, y=5, z=30)
- Loosen the toolbit screw, let the tool rest on the top face of the stock and then tighten its screw.
### Roughing Pass
Often, we'll want to complete a roughing pass to remove most of the material we want to remove, before a finishing pass (with a smaller end mill) to add fine detail.
I prefer to do a roughing pass using the finishing pass technique below (the mill 3D program), but with a 1/8" bit. (You'll want to set the Z zero to be a little higher than the top of the stock, so that you don't remove too much material).
Alternatively, you can use the "mill 2.5D" program:
- Right click -> Programs -> Open Server Program -> Machines -> Roland mill -> SRM-20 -> mill 2.5D stl
- You should see "socket opened" in the WebSocket device window. The machine should respond to the "move to origin" and "move to home" keys.
- Insert a 1/8" end mill
- Check units. Does the part seem to be the right size?
- Select stl file, change settings, and calculate
- Send file to device

### Finishing Pass
- Right click -> Programs -> Open Server Program -> Machines -> Roland mill -> SRM-20 -> mill 3D stl
- Insert a 1/16" or 1/32" end mill
- Check units. Does the part seem to be the right size?
- Select stl file, change settings, and calculate
- Send file to device
-->
### Common Errors
- When the machine finishes running, wait ~5 seconds before opening shield. If you open too soon, communication is lost. In that case, turn off SRM20 and turn it on again. Communication should re-establish.
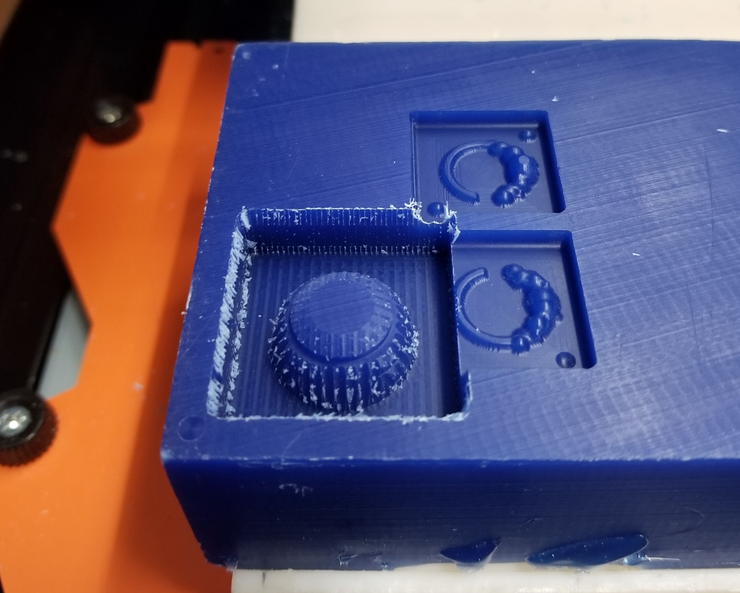
- The image below shows what happens when not enough of the end mill extends from the collet. The collet has rubbed the top edge of the mold, which shouldn't happen.
- You can also see that the "roughing pass" didn't quite line up with the finishing pass, leaving a contour around the sphere. Make sure you don't remove too much material on the roughing pass by lifting the end mill ~1mm above the top of the stock.